Bob's Projects & Ideas
A-Frame Greenhouse
Bob's Big and Little A-Frames
Another easy Build-It-Yourself Greenhouse, with Two Surprising options!
For almost thirty years I've published ideas and articles about Rebar Greenhouses. I like Rebar Greenhouses. Rebar Greenhouses continue to be excellent low-cost, easy-to-build season-extenders. But now, after over thirty years of greenhouse building, I finally found what I think is the best easily-built design for a wider greenhouse - the A-Frame!
Why the A-Frame Design?
The A-Frame design is low cost is easy to design and build, even for amateurs, and it heats up fast. It's strong, attractive, and very stable if anchored by stakes or rods. A-Frame greenhouses can be made wider and stronger than rebar greenhouses. Wider greenhouses are easier to heat in winter, because of fewer square feet of outside walls per amount of inside space. There is just one basic shape to make, an A... Two legs and cross beams on each. Two persons can put together easily. A small A-Frame can even be made solo.
Wood
You can use recycled lumber or buy new lumber. (We used recycled lumber and winter came before we could paint the entire cross bracing, but it's up and ready to use in spring.) I recommend pressure-treated lumber to resist decay, because greenhouses can be hot and humid. If you don't use pressure-treated wood, at least the sill plates on the ground should be treated wood. Don't use creosote in a greenhouse. Copper or zinc based treatments are best according to what I have read. I buy lumber at half price from lumber stores. It may be twisted or bent a bit, but in a greenhouse that's not critical. Paint everything white and be sure to install lots of vents. See Prolonging Your Poly Life.
Size and Shape
Our A-frme greenhouse is 35' x 60' x about 18' tall. It is cross braced inside. Having the width double the height seems great for snow to slide off nicely by itself from the warmth of the sun. Going wider may be ok if you only get a little snow. See photos.
Consider Using a Steep Angle!
Consider your climate. Up here in the north, I prefer a very steep angle/slope. Why?
- No roof-shoveling. I don't like shoveling at 20 degrees below zero Fahrenheit. And with steep walls I don't have to shovel the roof. The snow slides off really well all by itself when the structure is steep.
- Snow that's already slid off the structure can't collapse it from the top down. It isn't on the top.
- In winter when the sun is low in the sky, a steep slope catches more of the sun, because the sun then strikes the wall/roof at closer to a 90 degree angle, collecting more heat and light. More heat and light can get into the greenhouse because... the snow slides off, remember? I love it!
- Air circulates better in a steep high structure. Better air circulation promotes healthy plants.
- Hot air is easier to ventilate with a tall building because hot air rises and higher up vents built high up in the ends draw out the summer heat, and then your low vents can draw in some fresher cooler air. This reduces or sometimes even eliminates the need for fans and the use of electricity, depending on where you live.
- Tall plants such as sunflowers, corn, even some trees, can be grown in a tall A-frame. In a tall greenhouse you can have multiple levels or tiers of plants. This is great for the creative and ambitious "green-thumber". In our warehouse I grow flowers on a shelf that is ten feet up in the air. The effect can be quite dramatic. Having certain plants up high saves space lower down for other plants or work. We use the lower part for making poly pieces for our customers in the warehouse, or growing plants like tomatoes, grapes, berries, herbs, and so on in our greenhouse. If you try this multi-level gardening, be sure to make the upper levels strong enough to be safe. We'd love to have picture of what do! Please let us know whether we have your permission to put it in our catalog and/or on our website. Thanks!
- Steeper angles may increase survival chances for your poly (no guarantees on this, but it seems to help.) We had a thunderstorm with category one hurricane force winds. Big trees snapped in two, and our lower -sloped metal house roof got dents in it from branches torn from their trees, but our 20' tall A-frame garage, with fallen tree limbs around it, had no damage. I find A-frame shapes are very stable in wind, compared to vertical walled structures.
Choosing the Angle and Height
To choose the angle, there are number of methods: you can make a scale drawing on paper, you can use twine or string to lay out a pattern on the ground. You can even just start right out with wood, if you already have some stored away. Whichever method you use to choose your angles and height, when you have something you like, try making on A with wood before buying and cutting all kinds of pieces.
Testing Your Design with Wood
Here's how you can test your design with on wood. Lay two pieces of lumber on the ground in a pointy V shape, and put a nail through the two of them to form a pivot. Then move the sides (legs) back and forth into a point and more gradual angles until you get a look you like. Then to see what the height would be, measure while it's still on the ground. From the point of the upside-down V, measure down the center of the V, down to what would be the center of the base. When you get something you're satisfied with, take a pencil and draw a line on your sample boards to show yourself what angle to cut from the plywood or metal to attach to the front and back edges of the peak of the A. cut and test a template for that. Finally, find out the length for the cross beams by putting a piece of wood across the A at the appropriate height and marking it with a pencil to show where to cut. The appropriate height varies slightly with the intended use of the structure. If your A-frame is to be a machine shed, you will built a much taller A with a much higher cross beam than if you are making a greenhouse. We built a big A-frame shed to store our snow-clearing tractor and our pickup truck. For a greenhouse, you would probably want a cross beam about 7 to 10 feet up from the ground, so that you can hang plant baskets from it in the summer, and tack a temporary ceiling (of poly) on it in the winter to contain the heat and keep it close to the plants. Think about all these things as you design and as you tweak your plan until it works, or call in an experienced carpenter or friend to help you get it the way it needs to be. Delay cutting the lumber until you are sure your design (your sample A) is appropriate for the intended use.
Cutting the Legs, Cross Beams, and Triangles for the A's
For each A you want to make, you need two leg pieces, two triangles of plywood or metal (one for the front and one for the back) to secure the legs together at the top, and cross beam to secure the legs the proper distance from each other further down. It is this cross beams for stability, one about 7 to 10 feet from the bottom and the other higher up. Once you have a working template for the five or six pieces of the A shapes, cut the rest of the lumber to match your templates.
Making the A's
Each pair of legs should be joined at the top and at the cross beam. Join the leg pieces together at the top with long nails or screws to form the legs of the A. At the top of each A, attach triangle of plywood or metal and use those to join the top ends of the legs of the A together securely. Attach a cross beam at about 7 to 10 ft. up from what will be the bottom of you're a, or at the appropriate height for the intended use of you building. A tall A needs an extra cross beam higher up. This makes the cross-piece of the A, adds structural strength, keeps the angle even, and will later give you some cross pieces on which to attach a temporary plastic ceiling in winter and hanging baskets of flowers or other plants during the growing season. See "Temporary Inner Ceiling" (three paragraphs further in this article.)
Preparing the Base and Anchoring it to the Ground
To prepare the bottom sill plates I nail together two thicknesses to 2" × 8" lumber to make 4" × 8" beams for the sill or I make a double layer of 2" × 6" lumber to make 4" × 6" beams to use for the sills. Remember they should be made of treated wood. (See "Wood" info near the start of these instructions.) I drill half inch diameter or so holes in the sill (bottom plate) every 8 feet. To anchor the base of the structure to the ground, I insert rebar, or pipe, perhaps two feet or so long through the holes. I bend over the top few inches with a sledge hammer. This will help prevent the sill from pulling up.
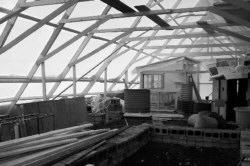 Interior of A-frame, still under construction, showing small interior greenhouse, which warmed up to 68 degrees F inside, by solar heat alone, despite the wind-chill factor
outside, and the ice on the inside walls of the big A-frame. This will allow us to start seedlings earlier in the spring and heat only at night. We may find that we can simply
cover the seedlings at night in spring and not have artificial heat out there at all. See article.
Rafter Spacing and Anchoring the A's to the Base
I'm now using eight foot spacing on the steep tall A-frame because the woven poly I sell is strong. To make strong supports use 2" x 6" or 2" x 8" treated lumber, for the cross beams the sides are also strong. Attach stringers of lumber along the side to join the A's.
Temporary Inner Ceiling for Winter Heating of a Tall A-Frame
To more easily warm the planting area of a tall A-frame in the middle of winter, temporarily attach poly to the lower crossbeam to conserve heat. This stops the warm air from getting too high up and too far away from the plants. You can take off this temporary low ceiling once the summer comes. In summer you want the warm air to rise higher and be vented out the tops of the ends.
Two Surprises... Little greenhouses with special uses!
Surprise #1! "Indoor Baby" Starter Greenhouse!
Hidden safely away inside the big 60' x 35' x 18' A-frame is a little 7' x 20' x 8' starter greenhouse, where I can go to prepare pots and soil for an early spring start in another month or so. As I write this, it is 1 pm and it's February. The temperature outside is 1 degree F which is -17 degrees C, but inside the sheltered "baby" greenhouse it's 62 degrees F, or +16 degrees C, simply from the heat of the sun and the shelter of the big greenhouse surrounding it. Both are heated only by the sun. There was no man-made heater or furnace, just passive solar heat from the sun shining through the outer greenhouse and into the inner greenhouse. The big A-frame is covered by Superstrong Woven Poly and has some glass windows on each end for visibility. The smaller, lower, rectangular greenhouse within is built of our woven poly. The shelves of the little inner greenhouse are covered with our white poly for the maximum amount of reflected light. The North wall of the little one is insulated, but both greenhouses are covered with just one layer of poly on the other walls. The inside of the A-frame poly is covered with a layer of ice. So it is freezing inside the A-frame greenhouse because it's so bitterly cold outside. But sunshine is shining and heating even though the ice covered poly and the sunshine enters the smaller greenhouse through its woven poly covering and has raised the temperature inside with the small greenhouse to 62 degrees F which is 16 degrees C. it's almost unbelievable, with no heater. Margaret went into there to warm up before going back outside to take more pictures.
When we took the pictures on this page, our digital camera froze up even though we sheltered it in out jackets. But our little greenhouse within a greenhouse was warm, toasty, despite the coldness outside. Of course, it cools down at night, but not as much as outside. It would have to be heated if we wanted to use it while it is still this cold. But to start plants it's cheaper to heat this little sheltered inner greenhouse than to heat the entire surrounding big greenhouse.
Surprise #2! "Outdoor Baby" A-Frames! Cute Little Starter Shelters!
Outside the big A-frame, and other places on the property, wherever we want to warm up the outdoor soil early or shelter outdoor plants early or late in the year, we can make cute little triangular prism-shaped starter shelters. They look like mini A-frames, and can be carted all around to wherever you need them. The top can flip open on warm days and be closed overnight and on cooler days.
So have some fun! Build yourself some A-frames, or whatever shape you would like to build. One of our customers built himself a little five sided greenhouse. Happy growing, whatever design you choose or invent. Consider climate, strength, safety, and beauty when designing what you decide to put on your property. To many areas you also need to get a building permit from your city, town, village, or municipal government. Better safe than sorry. Most are very helpful if you approach them ahead of time.
[an error occurred while processing this directive] [an error occurred while processing this directive]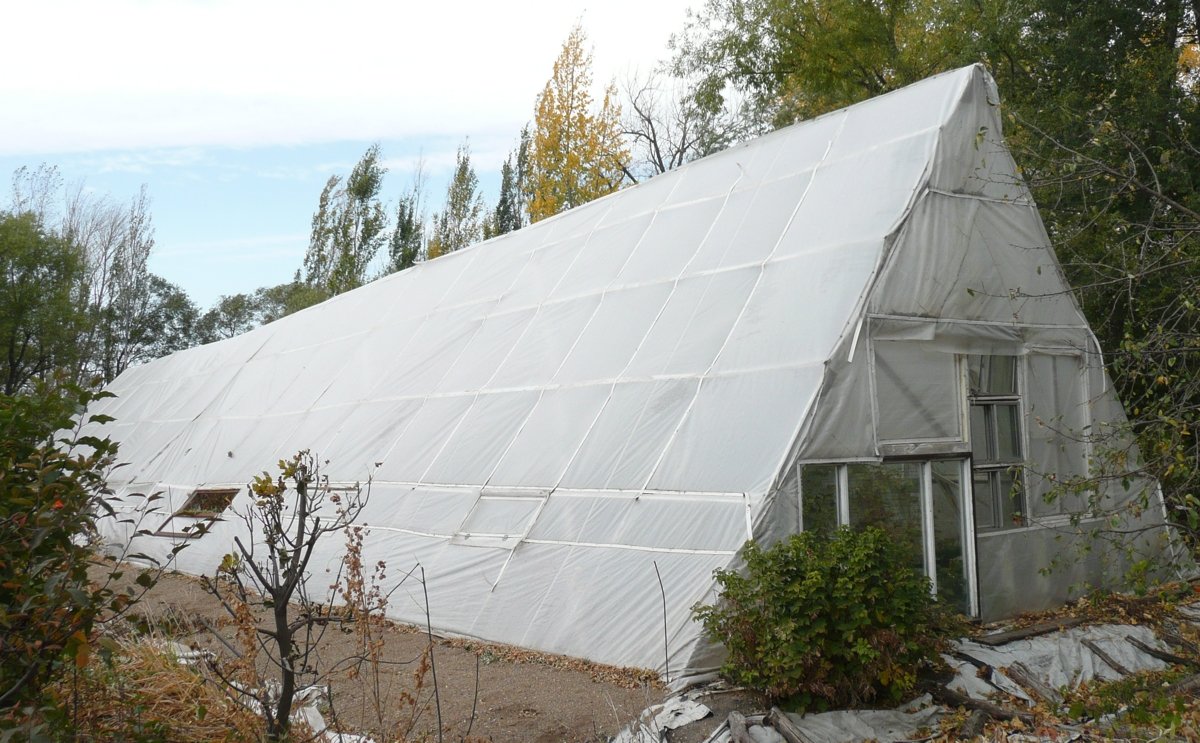
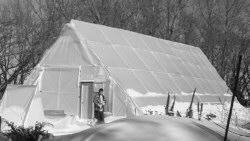 Bob in front of our 2006/2007 A-frame.